In this tutorial, we’ll build a ChatGPT-like web application using Dash and OpenAI’s GPT models. We will create a simple but powerful interface that allows users to interact with an AI assistant, with persistent message storage using browser local storage.
You’ll find below a demo video of the app.
Let’s get started!
Prerequisites
Before we begin, make sure you have Python 3.9 or later installed. We then need the following:
- Dash Plotly: the best Python framework for building interactive web apps and dashboards;
- Dash-chat component: a community-supported tool for creating chat user interfaces (UI);
- OpenAI package: used to retrieve responses from OpenAI GPT models.
Important : you’ll need an OpenAI API key to run the following code. You can get one from the OpenAI platform.
Step 1: Setting up the Environment
First, let’s install the packages using pip:
pip install dash dash-chat openaiThen, let’s import our required packages and set up our OpenAI client:
import os
import dash
from dash import callback, html, Input, Output, State, dcc
from dash_chat import ChatComponent
from openai import OpenAI

# Initialize OpenAI client
api_key = os.environ.get("OPENAI_API_KEY")
client = OpenAI(api_key=api_key)
Note: We’re getting the API key from environment variables for security. It’s a best practice not to hardcode keys in your code to avoid sharing it by mistaking.
Step 2: Creating the application layout
Next, we’ll create our Dash application and define its layout:
app = dash.Dash(__name__)

# Define default messages for the chat
default_messages = [
    {"role": "assistant", "content": "Hello!"},
]

app.layout = html.Div(
    [
        ChatComponent(
            id="chat-component",
            messages=[]  # Initialize empty since we'll load from storage
        ),

        # The store component help use save messages
        dcc.Store("chat-memory", data=default_messages, storage_type="local"),
    ],

    # Some basic CSS styling for the app
    style={
        "max-width": "800px",
        "margin": "0 auto",
        "font-family": "Arial, sans-serif",
        "padding": "20px",
    }
)
The Dash Chat component follows the same structure as the OpenAI conversation API with role and content. The AI messages will have role="assistant" while the user messages will have role="user".
Instead of passing the messages directly to the ChatComponent, we save them into a dcc.Store component. This component will enable us to persist the messages in the browser’s session: the discussion will still show up if we reload the page, but will be cleared if we close the tab/browser.
Good to know: setting storage type to “local” enable saving the discussion even when the browser is closed. You might want to create a reset button if you do so!
We also added basic CSS styling for the app. In Dash, you can either add styling with the style parameters on most components or include your styles in an external stylesheet (see more).
Step 3: Implementing the chat callback
Callbacks make Dash applications interactive by linking Input components (user actions) to Output components (updates in the app) while handling logic on the server:
- Input triggers a callback based on user actions, such as typing a message in the chat.
- Output defines what part of the app updates, like refreshing the chat interface with new messages.
- State retrieves current values without triggering a callback, useful for accessing stored data like chat history.
Here’s how it works:
@callback(
    Output("chat-component", "messages"),
    Output("chat-memory", "data"),
    Input("chat-component", "new_message"),
    State("chat-memory", "data")
)
def handle_chat(new_message, messages):
    # If new_message is None, just return the stored messages
    # This is run at page load
    if not new_message:
        return messages, messages

    # If we have a user message, concatenate it to the list of messages
    updated_messages = messages + [new_message]

    # If the new message comes from the user, trigger the OpenAI API
    if new_message["role"] == "user":
        # We use the OpenAI completion API to get an answer to the user message
        response = client.chat.completions.create(
            model="gpt-4",
            messages=updated_messages,
        )
        bot_response = {
            "role": "assistant",
            "content": response.choices[0].message.content.strip()
        }

        # Append the new message to the message list
        updated_messages += [bot_response]

    # We update both the chat component and the chat memory
    return updated_messages, updated_messages
In this case, our input is the chat user input, provided by dash-chat component. The processing achieved by the callback will involve retrieving an answer from the OpenAI API, and the output is the updated list of messages.
Straightforward and simple 🙂
Learn more on callbacks with this tutorial: Dash callbacks, schemas and examples.
Step 4: Running the app
We finally add the code to run our server:
if __name__ == "__main__":
    app.run_server(debug=True)
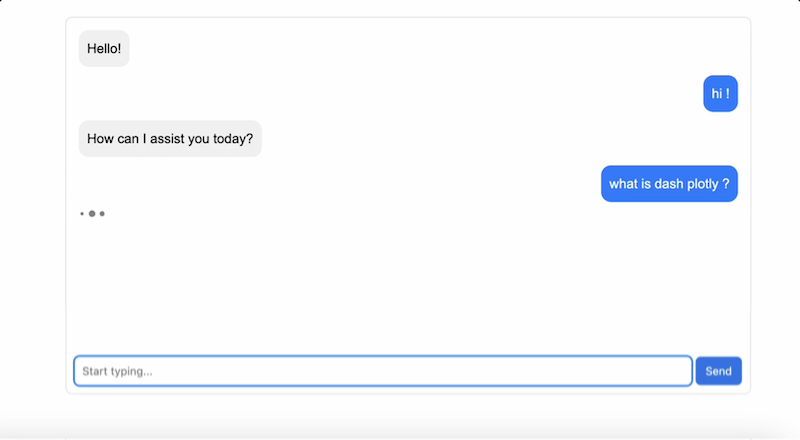
Here is the result:
You can try reloading the page; you’ll see the chat output is kept. But if you close the tab, a new session will be created next time.
Full code
You can download the full code below, with guided instructions on how to run the app:
Going further
Here are a few ideas to improve this chat app:
- add a “clear chat” button that triggers a callback which reset the messages sent ;
- add an input to join a file, so that the AI can answer based on content ;
- save messages in a proper database instead of browser storage.
The Dash Chat component is a recent work in progress, so be sure to check out the coming updates here.
Conclusion
I hope this short tutorial convinced you how easy and beginner-friendly it is to build a chatbot app with Dash plotly! With just a few lines of Python, you can create an interactive, AI-powered chat interface that works seamlessly in the browser.
Dash plotly can be used for both small data apps, AI apps, dashboard or real SaaS applications. It makes it easy to connect frontend and backend with pure Python. Check-out all the examples on plotly’s website: https://plotly.com/examples/
If you want more inspiration, here are a few other apps:
- A classic Todo app: A simple yet powerful app to manage your daily tasks, showcasing Dash’s flexibility for non-AI use cases.
- QuizDash: A fun app that generates quizzes on any topic using the OpenAI API.
- StockSaavy: An AI powered chat-agent that answers questions about recent news articles pertaining to stocks in the S&P500.
Happy coding! 👋